How to Build a DIY Rainwater System
Complete, open field notes to keep your garden watered all season using low-cost or recycled materials.
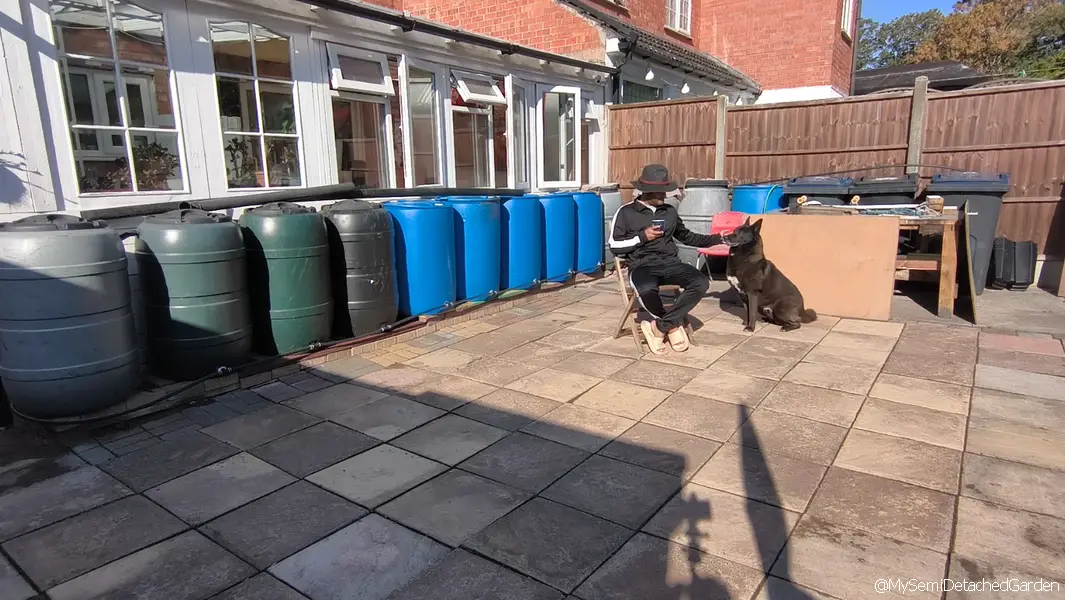
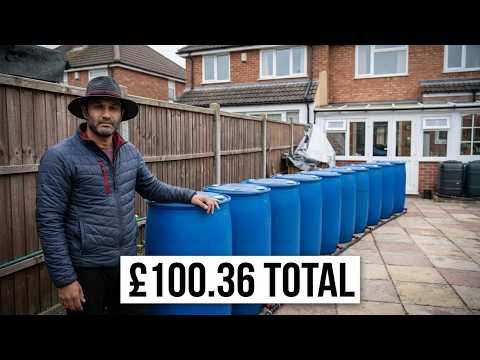
My finished 17 water barrel setup
“When I left my job to chase a peaceful, semi-rural life in the garden, I realised early on that relying on mains water during summer droughts wasn’t going to work. I built this guide so you can follow the exact process I used. If you’re new or unsure where to begin, work through this page in order starting with the Water Calculator right below to find your exact water target!”
Calculate Your Garden’s Storage Needs
Find out exactly how many litres you need to survive a summer drought.
See how much water you need →
The Idea Is Surprisingly Simple
Stepping away from the office desk to build a self-sufficient life gave me the clarity to appreciate elegant, natural mechanics. Before diving into pipe diameters and tank fittings, here is the basic mental model behind a multi-barrel gravity watering system.
Rain enters one barrel → barrels are connected at the bottom → water naturally equalises → you draw water from the system when your garden needs it.
Rainwater Harvesting System Flow Diagram

Follow The Build Or Jump Ahead
New to rainwater harvesting? Start with the calculator and work down the page. Already know what you need? Jump straight to the section you’re looking for.
My Semi-Detached Garden
Water Storage & Irrigation Calculator
Build your complete rainwater and drip setup step-by-step.
Step 1: How Do You Want to Calculate Your Needs?
Choose your measurement preference to reveal the usage options:
💧 Most Requested Setup Parts
As an Amazon Associate, I earn a small commission from qualifying purchases at no extra cost to you. Thank you for supporting the channel!
Watch the complete build
See exactly how I connected the system together.
Prefer following the written instructions?
↓ Continue below
Before You Build: Safety & Planning Guide
Stepping away from the corporate desk to build a self-sufficient life taught me one golden rule: measure twice, think through the limits, and build it right the first time. Review these practical considerations before ordering your fittings.
🔍 View 8-Point Safety & Planning Checklist
Empty barrels are light, but a full multi-barrel grid weighs tons. Always mount them on a solid, perfectly level base.
Plan where thousands of litres of excess stormwater will go once your tanks reach absolute capacity during heavy winter storms.
Water expands significantly as it freezes. Crack your ball valves or drain the bottom manifold before deep sub-zero weeks.
Expect natural organic debris, pollen, and dust from roof runoff. Simple mesh filters keep most particulates out of the drums.
Always verify drums are food-grade or previously held safe goods. Avoid old chemical or pesticide containers that leach toxins.
Keep stored water completely covered to block sunlight (preventing algae blooms) and stop mosquitoes from breeding.
Gravity handles short distances fine, but if you’re running long irrigation hoses uphill, factor in a low-pressure booster pump.
This setup is strictly designed for crop beds, fruit trees, and garden irrigationit is not treated for household drinking.
How to Build Your Multi-Barrel Rainwater System
Get your parts together first, then work through the five stages below. This is the same layout I used to connect my own system.
🔍 View Full 5-Step Build Guide & Parts Checklist
You’ll Need
Tick everything off before drilling into your first barrel.
Buying parts? Exact components are detailed further down the guide.
Position & Level Your Barrels
Place the barrels where you want the finished system to live on stable, level ground.
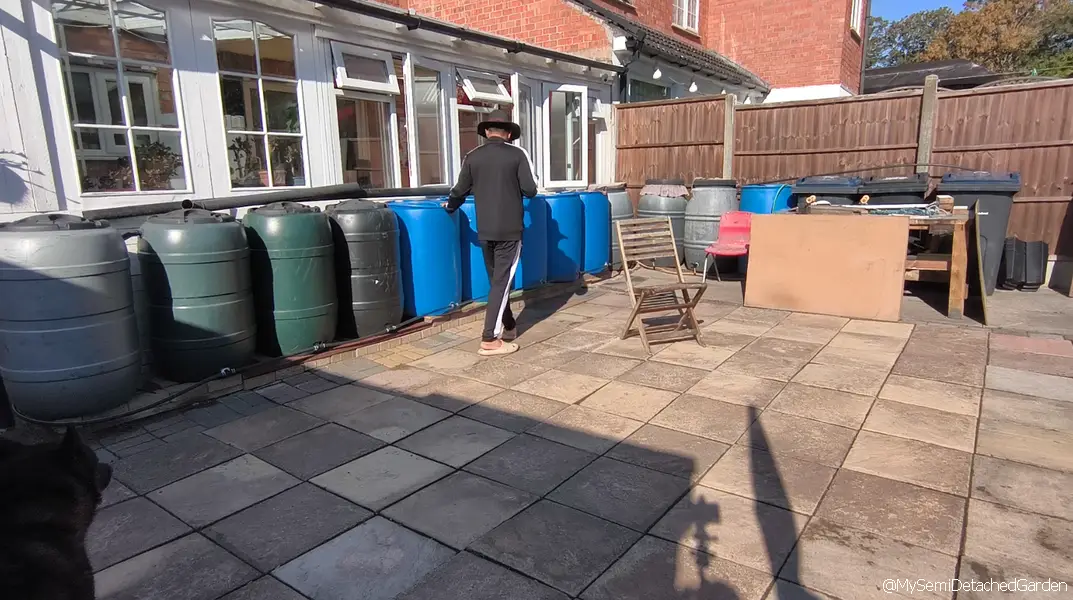
Line up your 200L drums along a wall or side passage evenly supported.
Water barrels, stable base, and a spirit level.
Don’t connect everything first and level later. Uneven weight stresses pipework.
Drill the Connection Points
Create the connection points near the bottom of each barrel for the shared manifold.
Mark a consistent position and drill clean holes using your 25mm spade bit.
Drill, 25mm spade bit, marker, and fittings.
Test your first fitting before drilling every barrel.
Seal the Fittings & Connect Barrels
Turn separate containers into one shared water-storage system.
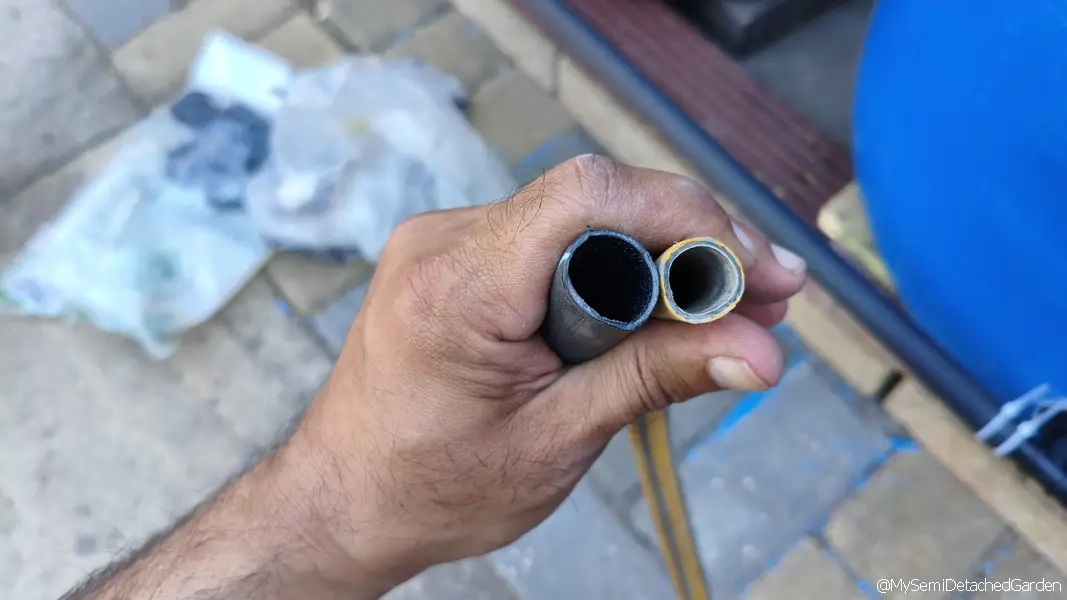
Install fittings, seal them, and link barrels using 19mm LDPE pipe and tees.
LDPE pipe, tee connectors, washers, and marine silicone.
Avoid sagging lines; keep the manifold neat so water flows freely.
Bottom connections allow water to naturally level out across all connected barrels.
Connect the Downpipe Diverter
Divert rainfall from your roof into the primary intake barrel.
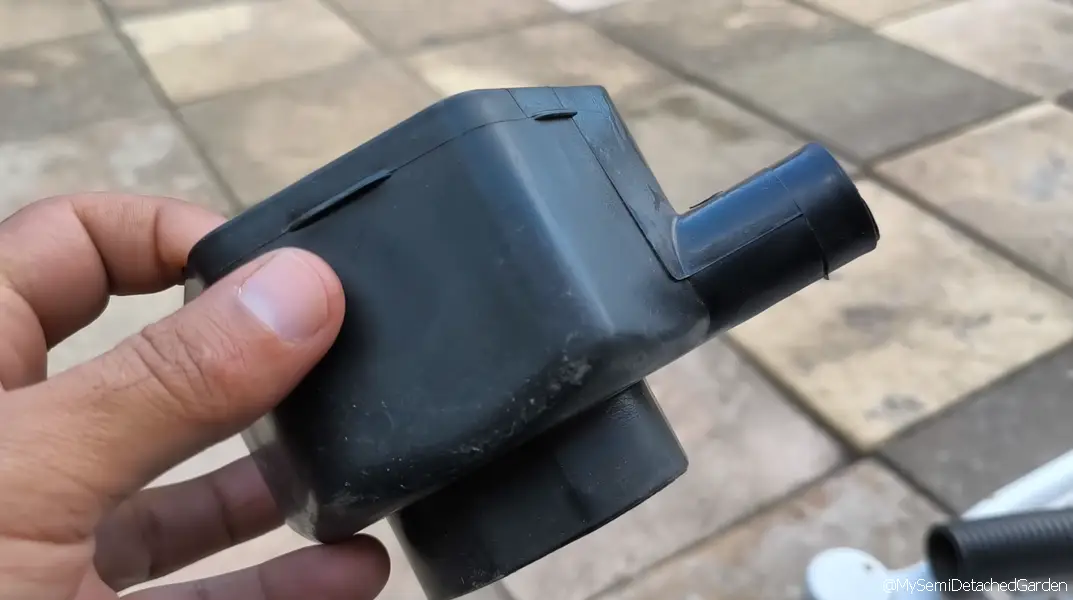
Fit the inline diverter to the downpipe and hook it to your main intake barrel.
Rainwater diverter kit, connection hose, and tools.
Double-check diverter height before cutting your downpipe.
Add Your Tap, Pump or Outlet
Decide how your stored water will reach your garden beds.
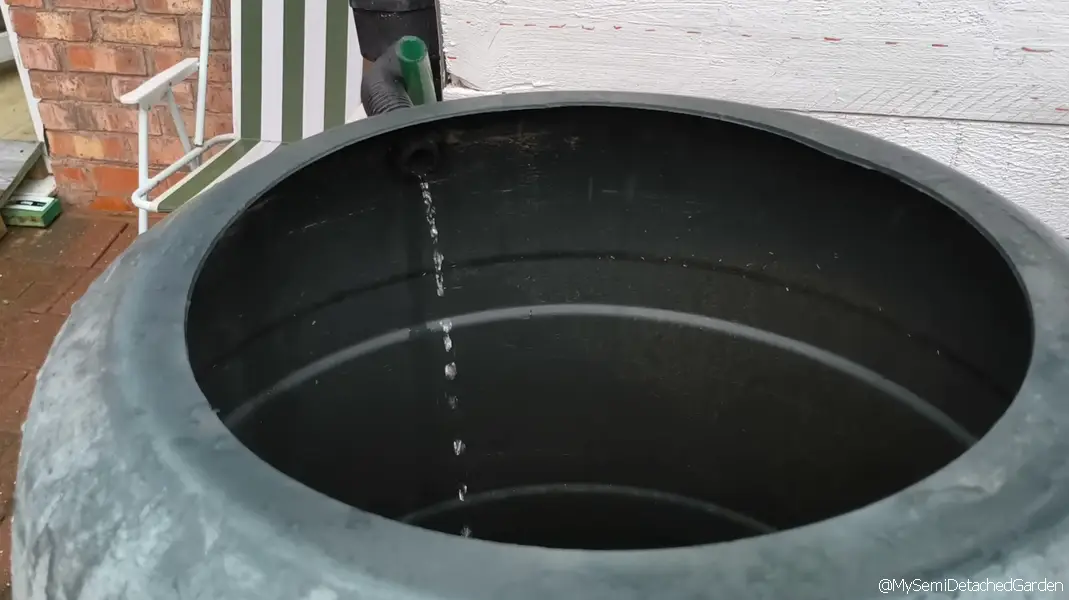
Fit your tap for manual watering, a pump, or an irrigation line.
Replacement tap, pump, or irrigation pipework.
Don’t assume gravity alone provides enough pressure for complex irrigation.
Let the system fill and check all fittings for leaks before relying on it.
Exact Parts I Used
Direct links to components used for the setup. As an affiliate, I earn from qualifying purchases.
💧 Drip Irrigation System
4L Pressure Compensating Emitters
100 PCS 1/4″ Adjustable Sprinklers
15m Irrigation Kit Set
30m Irrigation Kit
Submersible Pump for Rain Barrel
🌧️ Multi-Barrel Setup Parts & Connectors
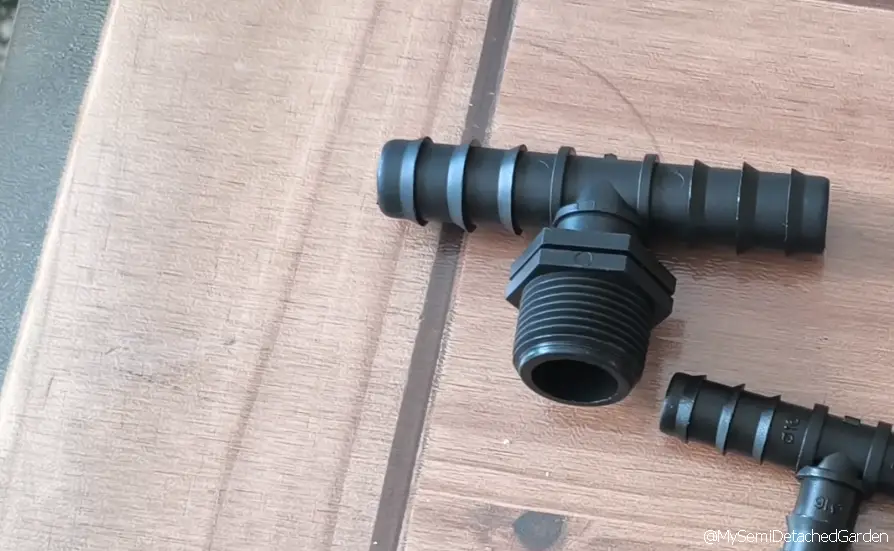
19mm Tee x 3/4″ BSPM Connectors
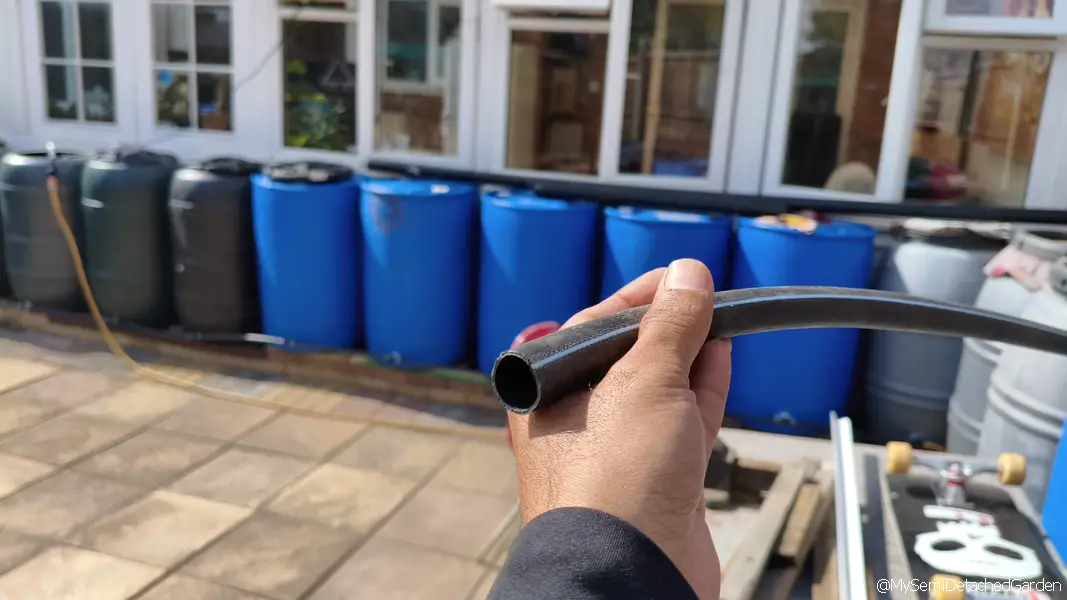
19mm – LDPE Irrigation Hose
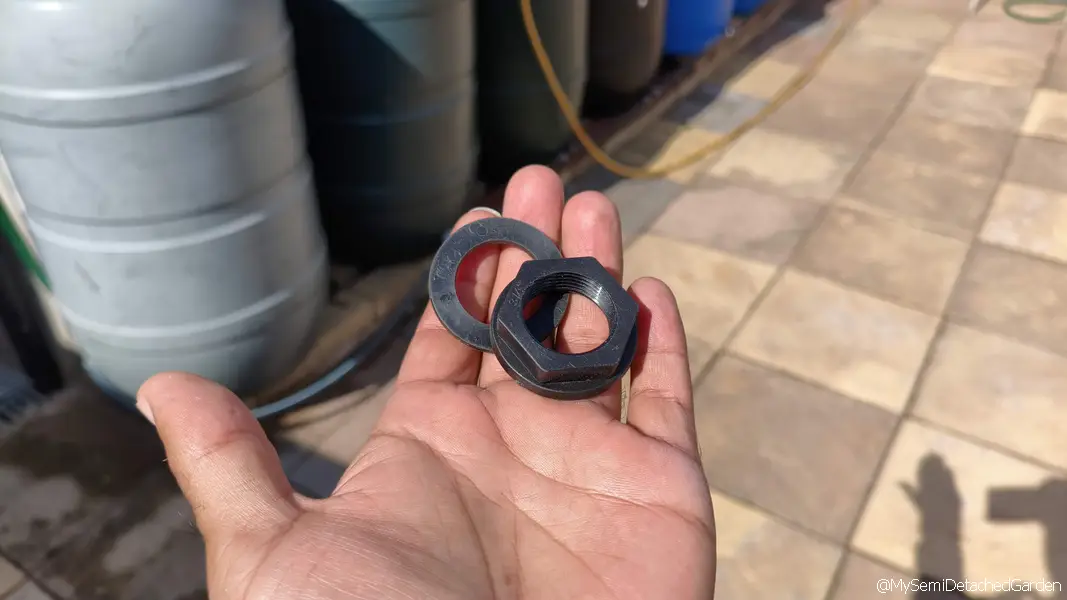
2in BSPF Back Nut with Washer
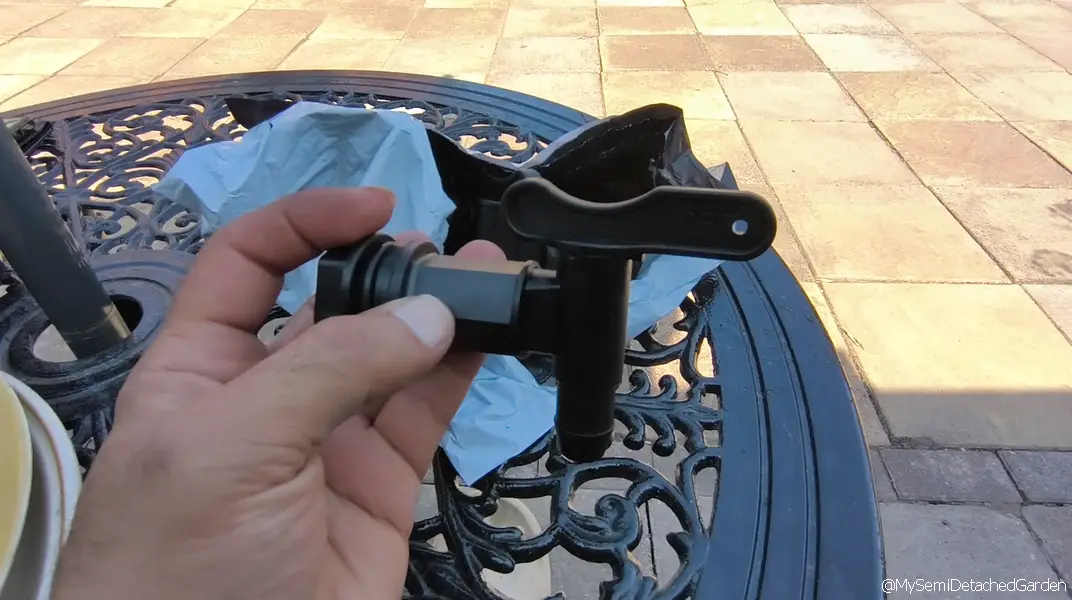
Water Butt Replacement Taps
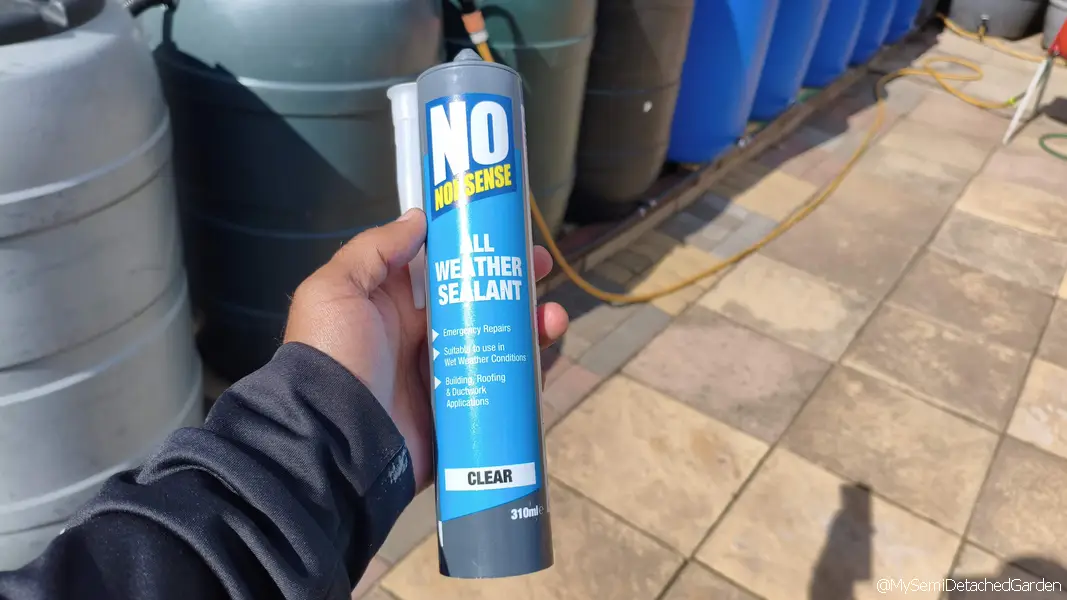
Silicone Marine Safe
Water Butt Rainwater Diverter
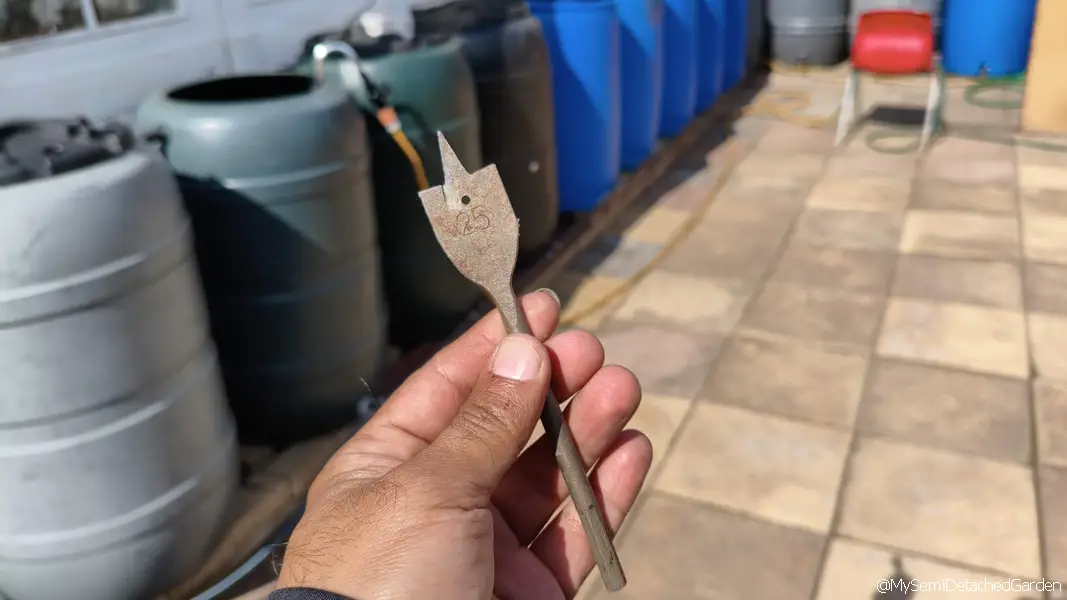
25mm Spade Bit
Plastic Cable Ties
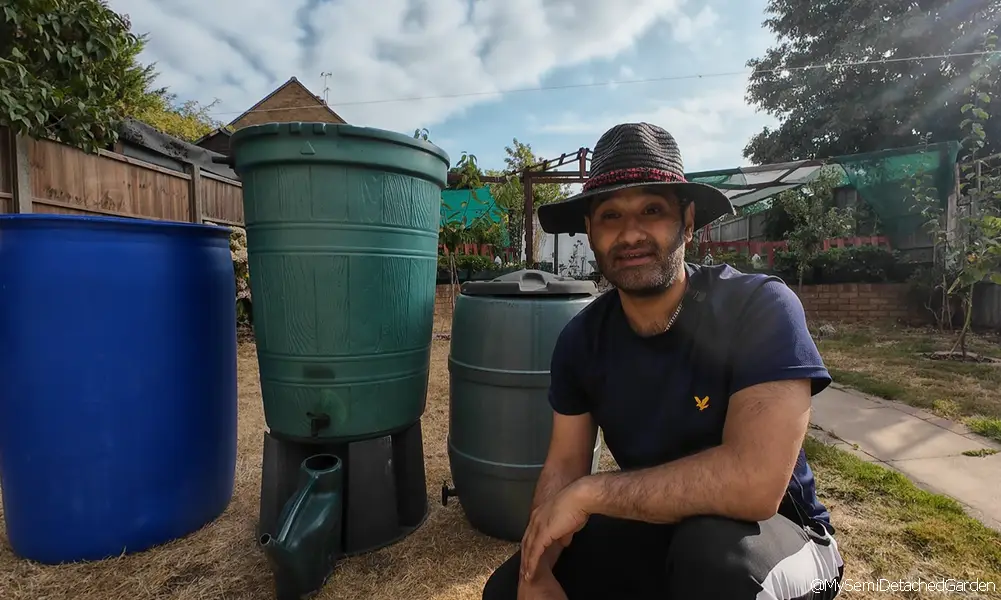
200l Rain Barrel Tip
💡 Ziggy: Check Facebook Marketplace or local shops first for cheaper barrels if you have a car! If you need delivery, here’s a budget option:
Amazon vs. Local Trade Shops
Ziggy’s Tip on Buying Smart: Leaving the rat race behind taught me the value of keeping things local and cutting out unnecessary middlemen. Amazon is undeniably convenient if you want everything dropped at your gate in one go, but stepping away from the office desk means you’ve got the space and the freedom to look around. If you want to save a few pounds and support local trade, here is how I’d break down where to look.
Ideal for grabbing 25mm spade bits, heavy-duty cable ties, and marine silicone at low trade prices without waiting around for shipping.
Great spots for sourcing 19mm LDPE pipe and back nuts in bulk at direct contractor rates.
Always check these locally for cheap or free recycled 200L drum barrels before paying for online shipping.
Common problems & fixes
Everything you need to know about setting up, scaling, and maintaining a multi-barrel gravity rainwater system for your garden.
Q: How do the barrels fill evenly if water only enters one drum?
Because all barrels are connected along the bottom with 19mm LDPE pipe, water uses gravity to automatically equalize across every single container in the system.
Q: How do I stop joints and threads from leaking?
Always apply a generous bead of marine-safe silicone sealant around both the internal and external threads before tightening your back nuts and washers.
Q: What happens when the whole system gets completely full?
The downpipe rain diverter kit automatically stops taking in water once the main intake barrel reaches maximum level, sending excess overflow straight down the storm drain.
Q: How long does 3,400 to 4,000 litres actually last in a summer drought?
At a usage rate of 1 barrel (200L) per week for crop beds and fruit trees, 17 barrels provide roughly 17 full weeks of continuous watering easily surpassing the 10-week mark needed to survive extreme dry spells. Peak summer calculations show it covers about 4.5 to 5 weeks when running heavy daily irrigation.
Q: Do the connected barrels freeze and burst in winter?
Flexible hose couplings allow slight expansion. Leaving the main brass ball valves slightly cracked or draining the bottom manifold before deep sub-zero weeks prevents pipe damage.
Q: Why not just use second-hand 1,000L IBC totes instead of multiple barrels?
Second-hand industrial totes often contain chemical residues, surfactants, or pesticides that can leach into rainwater months later and ruin organic vegetable beds.
Q: Why did the viral drilled-hosepipe irrigation hack fail?
Drilling unmetered holes into a standard garden hose drops system pressure exponentially, reducing head pressure to zero by the tenth hole and starving the end of the bed.
Q: How do I handle heavy flash floods or storms that fill barrel one too fast?
Installing a secondary top-overflow link across the first few barrels provides a fail-safe buffer, allowing excess volume to move down the grid while the bottom 19mm manifold equalizes.
Frequently Asked Questions from the YouTube Community
Stepping away from the office desk for a quieter, semi-rural life means learning to do things a bit differently. Here are answers to the questions that pop up most often in the comments:
- 🔗 Is collecting rainwater illegal in the UK?
- 🔗 Why didn’t you just get an IBC container?
- 🔗 Why did you remove the RCD from the water pump?
Is it illegal in the UK to collect water from rain?
From the comments: “Surely collecting rainwater straight from your roof is illegal or heavily restricted in the UK?”
“Not at all! There’s a common misconception out there, but collecting rainwater on your own property for domestic and garden use is completely legal in the UK. Rainwater harvesting has been one of the most freeing ways to step back from utility dependencies and embrace a simpler rhythm out here.”– Ziggy –
Source: According to the Royal Horticultural Society (RHS) and Environment Agency guidelines, collecting rainwater that falls directly onto your property’s roof or land is completely legal and unrestricted for domestic use.
Rainwater harvesting systems connected alongside mains supplies must include adequate backflow protection under Schedule 2 of the Water Supply (Water Fittings) Regulations 1999.
See for more details on YT here: Watch the video ↗
Why didn’t you just get an IBC container?
From the comments: “You can imagine you’re not the first to ask this! Why on earth didn’t you just buy a 1,000L IBC container instead of messing with barrels?”
“A few people have suggested them, and on paper, a 1,000L cube sounds like absolute common sense. But there’s a whole side to IBCs that no one is really talking aboutlogistics, narrow gate clearances, and the struggle to find genuinely food-grade units that aren’t leaching old industrial chemicals. Going modular made far more sense for my plot.”– Ziggy –
See for more details on YT here: Problem with IBC water tanks and what I’m using instead ↗
Why did you remove the RCD from the water pump?
From the comments: “Careful with that water pump! Why did you take the RCD off the plug? That looks like a safety hazard.”
“Appreciate everyone looking out! To clarify, the plug was swapped so the pump could run automatically on a timer (the original RCD required a manual reset every cycle). Everything remains fully protected by a separate local (extenstion) and main-board RCD setup. Working with electricity outdoors carries inherent risks. Always consult a qualified professional before altering any electrical components.”– Ziggy –
Disclaimer: Working with electricity outdoors carries inherent risks. Always consult a qualified professional or expert before altering any electrical components or wiring on your own setup.
See for more details on YT here: Watch the video ↗
🟢 Live Working Document
Ziggy’s Drip Irrigation & Rainwater Field Notes
Real-world troubleshooting for water butt setups, low pressure drip irrigation, and pump failures.
Click to expand notes ▾
Ziggy’s Drip Irrigation & Rainwater Field Notes
Real-world troubleshooting for water butt setups, low pressure drip irrigation, and pump failures.
Drip Irrigation Volume & Summer Demand Audit Read more
Audited system endurance following community feedback on peak summer water consumption. Configured timer sequence (5 min on, 10 min off, 8 min active pulse = 13 mins total flow) across 88 total emitters (8 drippers per bed across 11 raised beds). At 4L/hour output, a single session consumes 76.27L, providing roughly 52 full watering cycles from the 4,000L modular storage. Field calculations and site calculator updated accordingly.
IBC Logistics Failure & Custom Lined Frame Pivot Read more
Reached out to two separate IBC manufacturers regarding delivery logistics and access constraints, only for communication to completely break down. Following brilliant suggestions from the YouTube community tab ↗, we are now pivoting away from standard cubes and looking seriously at constructing a custom timber-framed, heavy-duty lined reservoir or sunken pond structure instead.
Standard Taps vs. Custom Connectors & Leak Testing Read more
Tested a split approach across the barrel array: the newer additions use standard water butt taps with standard garden hoses and Hozelock-style snap fittings, contrasted against the custom connectors used on the first 10 barrels. While flow rates differ slightly, standard snap connectors have a habit of weeping under static pressure. Running this as a live seasonal experiment to see how long standard fittings hold up before failing.
32mm Bore Selection & Finalised Build Costing Read more
Researched a single 32mm main equalisation line over dual 3/4″ elevated pipes. The 32mm bore reduces internal wall friction drag by 31.5%, increasing passive volumetric transfer during sudden roof downpours while cutting tank penetrations and leak points by 50%. Recalculated total system outlay: Phase 1 (4,000L Storage) stands at £100.36, and Phase 2 (Drip Irrigation & Pump) at £94.17, giving a total build spend of £194.53.
Logistics Test: 1,000L IBC Totes vs Modular Blue Barrels Read more
Ran access and transport logistics tests for scaling water storage. Standard 1,000L IBC tote steel cages (1m wide) fail on typical UK suburban plots due to narrow 70cm side passage gates and heavy freight delivery requirements. Modular 200L blue barrels remain the optimal choicetransportable in a standard hatchback with zero delivery fees and easy single-person handling down narrow side paths.
Viewer Proposal: 1/3 Height Equaliser Pipe Integration Read more
Credit to YouTube viewer @MarKeMu125 for suggesting a secondary equaliser pipe across the array mounted 1/3 of the way up the barrels. Placement above the base avoids structural integrity issues caused by drilling multiple holes near the bottom wall, while doubling flow capacity whenever water levels exceed the 1/3 mark. Calculating fitting redundancy vs. flow gains for the final build update.
Pressure-Compensating Drip Upgrade & Dual Pipe Flow Modeling Read more
Ordered pressure-compensating drip line emitters to eliminate pressure drops across long beds. Currently running calculations to compare upgrading to a single larger main feed pipe versus installing a secondary equalisation line with dual connectors to balance system pressure cost-effectively.
Water Butt Pump Pressure Fix & System Upgrades Read more
Swapped to a 400W Titan water butt pump (£49.98) moving 3,000L/hr to fix low head pressure in long drip lines across connected rain barrels.
Calculating Garden Water Storage Needs in Summer Heat Read more
Math shows 3,500L of stored rainwater lasts 4.5–5 weeks during hot summer spells. Doubling reserve capacity to cover a full 2 months.
Micro-Drip Line Pressure Loss & Rain Diverter Overflows Read more
Running narrow 4mm drip tubing caused friction loss across long vegetable beds. Heavy rain overflowed the primary water butt before equalizing across linked barrels. An open ground pipe drained an hour of saved water into mud.
Fixing Leaking Threads on Plastic Water Barrels Read more
Plastic water barrel tap threads leaked under static water pressure. Sealed joints with marine silicone sealant.
Why DIY Drilled Hosepipes Fail for Soaker Irrigation Read more
Drilling manual holes along a standard garden hose dropped line pressure to zero by hole ten. Ruined a 30m hose instead of buying proper porous soaker hose or drip line.
Preventing Air-Lock Blowouts in Barbed Drip Connectors Read more
Push-fit barbed pipe connectors popped apart under sudden air pressure spikes in the mainline.
Cheap Water Barrel Bulkhead Fittings vs Brass Read more
Replaced heavy brass fittings with budget plastic tank connectors (£15 for 10) and rubber silicone washers to stop leaks cheaply.
Can You Use an Aquarium Pump for Garden Drip Irrigation? Read more
Small submersible aquarium pumps lack the vertical head lift and BAR pressure required to push water through a garden irrigation manifold.
Gravity-Fed Drip Irrigation Pressure Limits Read more
Gravity pressure alone without a pump does not produce enough flow rate to run micro-drip emitters on vegetable beds.
What 4,000L of Rainwater Costs
| Item / Component | Cost |
|---|---|
| Holding 4,000L of Rainwater | |
| Reclaimed Blue Barrels (3 @ £10 ea) | £30.00 |
| 10x Plastic Hose Joiners | £5.52 |
| 10x Threaded T-Piece | £7.42 |
| 19mm LDPE Pipe (10m) | £14.49 |
| Back Nuts & Sealing Washers | £11.45 |
| Silicone Tube | £5.99 |
| Cable Ties | £1.99 |
| Wastage: Water Butt Taps | £8.30 |
| Wastage: Garden Hose | £15.20 |
| Holding 4,000L Total | £100.36 |
| Optional: Drip Irrigation & Pump | |
| Titan Submersible Pump | £43.00 |
| Normal Plug Replacement | £2.50 |
| Timer | £5.99 |
| Drip Kit 30m | £22.69 |
| Wastage Error: 30m Hose | £19.99 |
| Drip Irrigation & Pump Total | £94.17 |
Surface Water Drainage Charge Check
If you completely divert your rainwater away from public sewers (using soakaways, water butts, or attenuation systems), you can claim a full rebate to remove this fee from your water bill.
⚠️ Important Note: This guide is for informational purposes only. Qualification criteria, application processes, and rules vary by region. Please check directly with your specific water provider using the resources below.
📋 How to Check & Claim Your Rebate
Verify 100% Disconnection
Ensure rainwater from all gutters, outbuildings, and paved areas drains into soakaways, rain gardens, or tanks with no public sewer overflow.
Gather Evidence & Diagram
Take clear photographs of your disconnected downpipes or soakaways and sketch a simple plan showing property boundaries and drainage flow.
Submit to Your Provider
Locate your water supplier in the directory below to access their official surface water exemption form and submit your claim.
🏢 UK Water Suppliers & Policy Links
United Utilities (North West)
Thames Water (London & Thames)
Severn Trent Water (Midlands)
Yorkshire Water
Anglian Water (East of England)
Southern Water (South East)
South East Water
Dŵr Cymru Welsh Water
Scottish Water (Surface Policy)
The Testing Bench & Q&A Log
Where I run the math, test viewer suggestions, and log technical answers to help build a better setup.
The MSDG Inner Circle Welcome, legends. You dropped a nice comment, so you’ve been initiated.
A confused internet stranger recently summed us up best: “At the end of the day you are a loony with loads of massive buckets in your back yard.”
Fair play to them. To clear up any rumors that I am a high-tech survival compound, a political cult, or anything other than someone trading corporate spreadsheets for a quieter life away from the office, here is my official community doctrine:
1. The Great Escape
More Sky-Water, Less Office Politics. Every gallon caught in a dodgy gutter is another small victory traded away from endless PowerPoint presentations and back-to-back meetings. I traded the desk job for peace, quiet, and a bit of dirt under the fingernails.
2. The Secret Rites
Membership requires zero plumbing credentials. Our official ceremony involves staring blankly at twenty mismatched barrels that are currently leaking onto the patio while wondering if today is the day the tomatoes finally grow.
3. Fluid Dynamics & Good Vibes
Water goes where it wants, physics is merely a suggestion, and the whole semi-rural setup is held together purely by hope, tea, and gaffer tape. I don’t take myself too seriously I’m just here for slow living and a laugh.
Pull up a chair, grab a brew, and welcome to the club.
🌿 Next On The Garden Plot
Can My Garden Feed Me? Suburban Food Security & Staple Crops
Can a standard suburban plot outperform a fragile supermarket supply chain? Discover real-world experiments in growing dense calories and high-yield staple crops in a typical UK garden, powered entirely by off-grid rainwater harvesting.